Publish a containerized .NET Core app using Docker, Azure DevOps, Azure Container Registry and Azure App Service
This is a guide on how to use Azure DevOps to build and then publish a docker image as an Azure App Service, using Azure Container Registry.
Prerequisites
This guide assumes basic knowledge in Docker and more specifically how to create a Dockerfile. This docker cheat sheet provides a ready Dockerfile with explanations, plus an easy way to create your own Dockerfile from within Visual Studio. The guide also requires an account on Azure and Azure DevOps. The code is hosted in Azure DevOps, but almost any -accessible from Azure DevOps- version control system will do.
In the process that follows, we setup three things mainly; An Azure Container Registry to hold the Docker Image, an Azure DevOps Pipeline to build and push the image to the registry, and and Azure App Service that will continuously pull the image from the registry.
Steps to setup Azure Container Registry
In order to setup an Azure Container Registry, you will of course need to visit portal.azure.com first. After signing in, follow the next three steps to setup and configure Azure Container Registry correctly:
Step 1
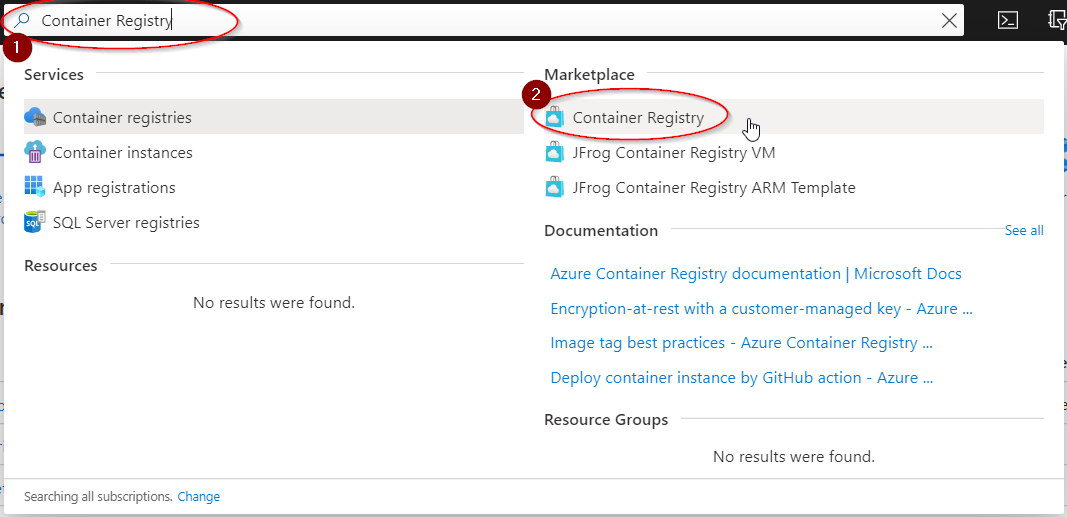
Use the convenient search bar on top to search for “Container Registry“. Once the results are in, click on the left side on the “Container Registry” result, as shown here:
Step 2
Once you clicked on the correct result, the “Create Container Registry” form will appear and a few selections have to be made. The minimum changes required here, are to select the Subscription and Resource group you wish (you can also create a new recourse), and to write the Registry name you prefer. Change the Location and SKU if needed and click Create once done.
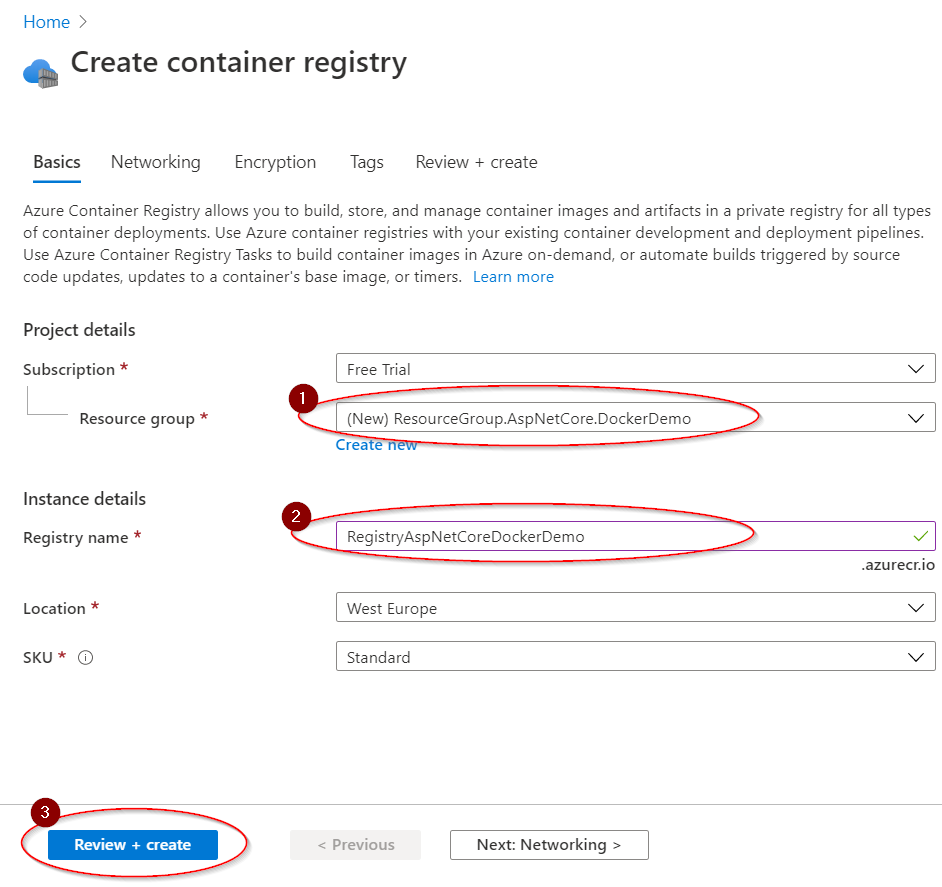
The Registry name is part of the Login Server for your Azure Container Registry. In this example it will be registryaspnetcoredockerdemo.azurecr.io.
Step 3
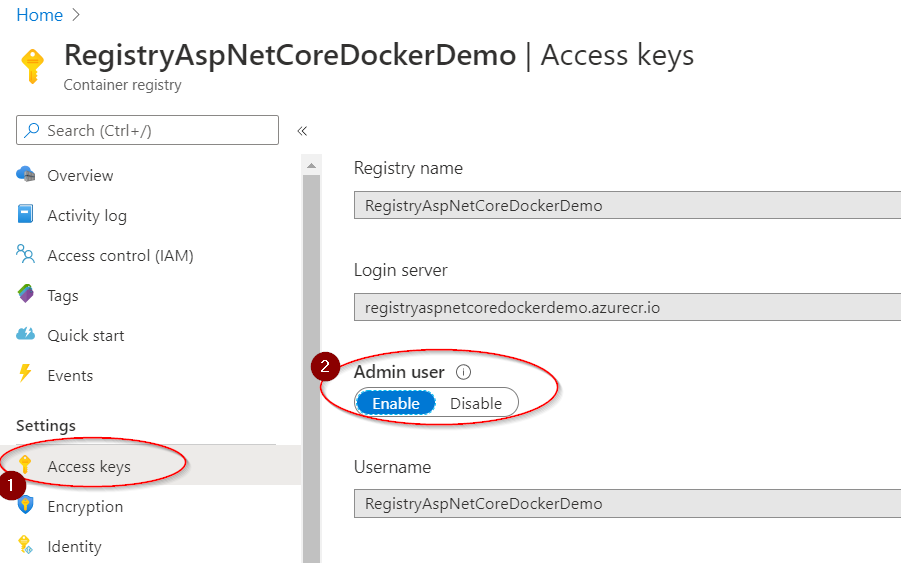
Enable the Admin user for this Container Registry. Although the admin account is designed for a single user to access the registry, mainly for testing purposes, in order to be able to use the current registry from an App Service and select image source and Continuous Deployment, the Admin user must be enabled. Find this resource and go to Access Keys to enable the Admin user, as shown below:
Read more information about the Admin Account in Microsoft Docs
Steps to setup Azure DevOps
We will return in to Azure after finishing and pushing one image successfully. The reason is, we first need to create the repository and image in our Azure Container Registry and then select it from the App Service for Continuous Deployment. Visit dev.azure.com, create a new project (or select an existing one) and follow the next steps to create the pipeline:
Step 1
First step, creating a pipeline! Click on the blue rocket on the left with the name Pipelines and when you see a screen like the one that follows, click Create Pipeline:
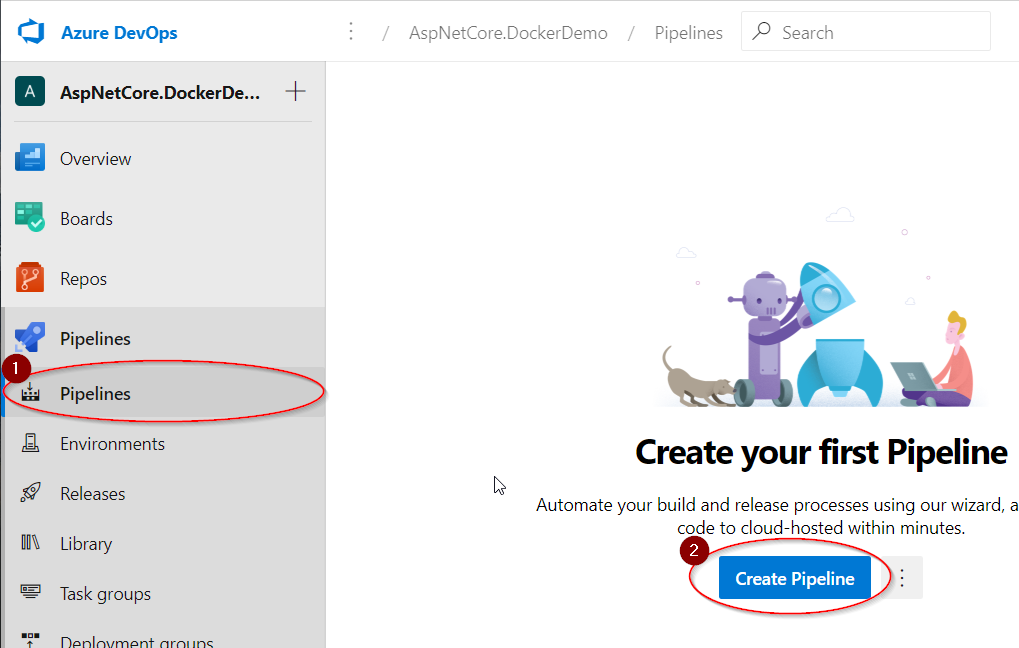
(it this is not the first pipeline, you should see a blue “New pipeline” button on the top right of your screen)
If it is a newly created project, then you need to enable Pipelines from the Project Settings (you might need to scroll down a bit)
Step 2
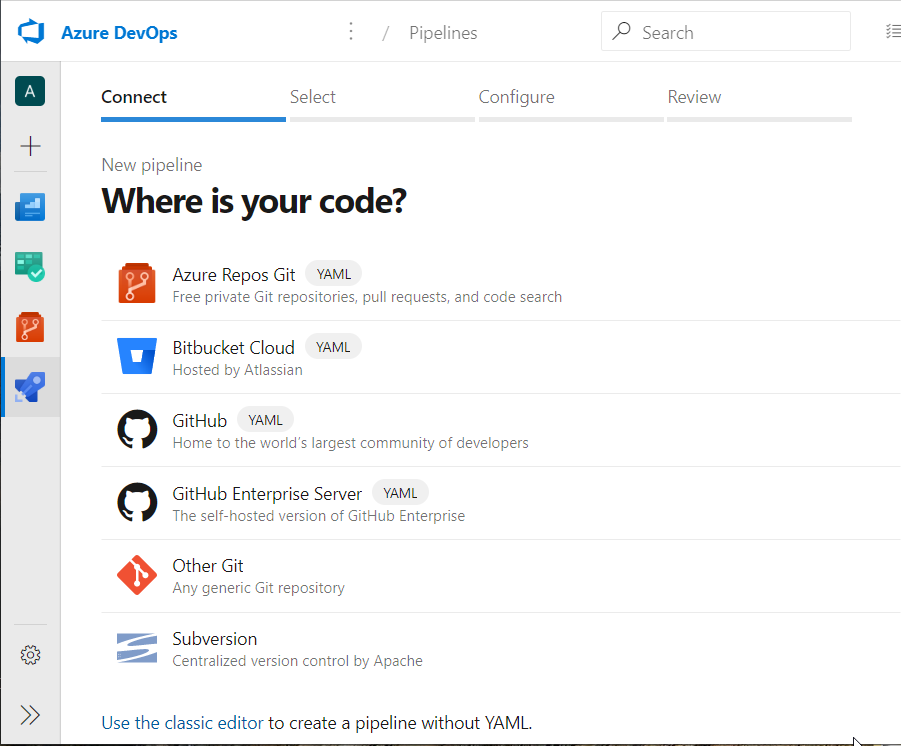
For this guide I uploaded the code to Azure Repos Git but there is no limitation, besides of course Azure DevOps being able to access your favorite version control service. In this step, choose your service and Azure DevOps will immediately try to retrieve all the repos of that service. Select the one and you will go to the next step. The available version control services are shown below:
Step 3
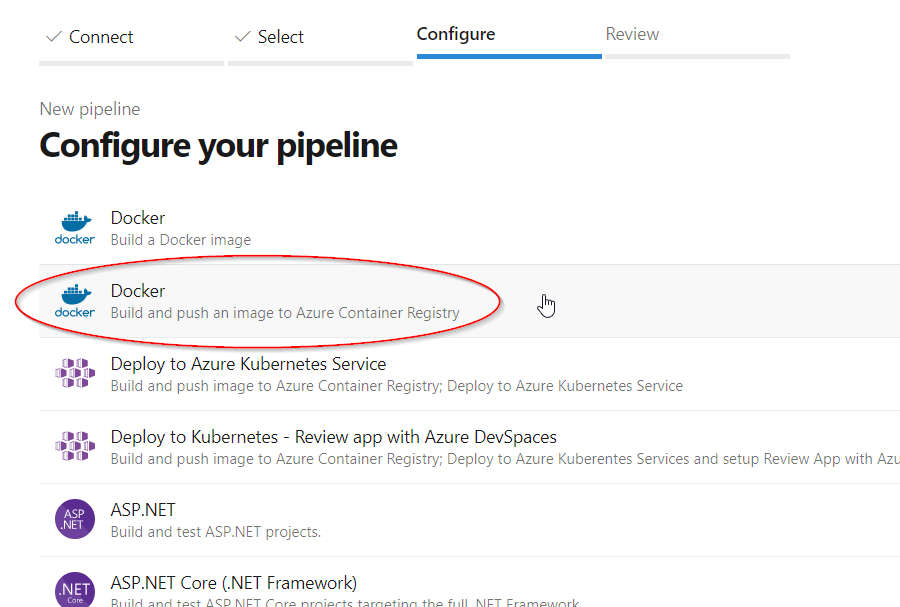
Azure Pipelines offer numerous templates to choose from for building, testing and deploying your app. For this current guide we will need the “Docker – Build and Push an image to Azure Container Registry” template. Click on it, but before we go the final “Review” tab we will need some intermediate configuration to do. The correct template is shown in the image below:
Step 4
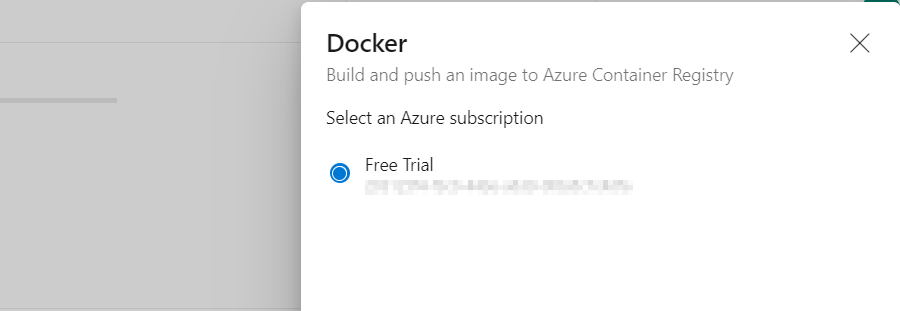
Fourth and fifth steps could easily be one, since in this one you will just need to select the desired subscription. Hopefully you use the same account in portal.azure.com and dev.azure.com so after a sort loading you should be able see a list of all available subscriptions. Select the one you want and click “Continue“. In the example below, only the “Free Trial” is available:
Step 5
After clicking “Continue”, you will see a few more fields appearing; mind only about the “Container Registry” dropdown menu. Find and select the one just created in Azure (in this guide RegistryAspNetCoreDockerDemo) and click the blue button “Validate and Configure“. In the image below you can see a sample of how that page might look like. The blue button mention is not visible in this screenshot:
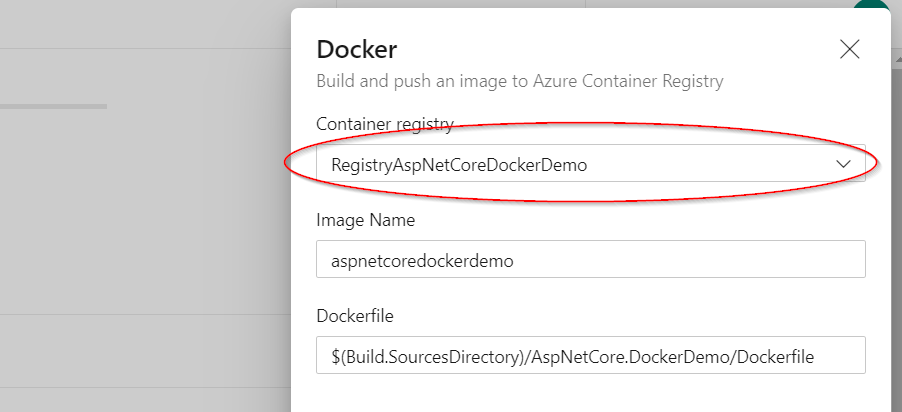
You might be asked to sign in to the Microsoft Account you use in Azure to retrieve the available container registries.
Step 6
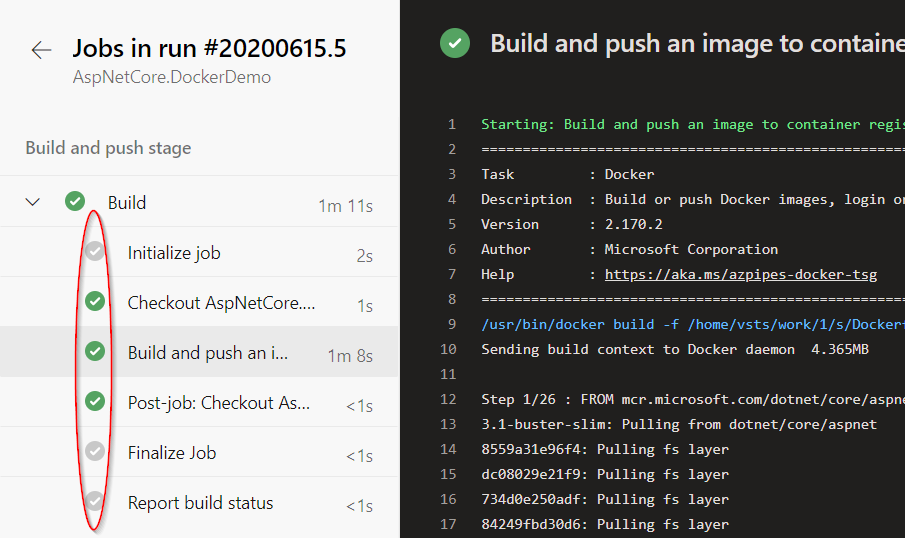
Easiest step of all since you are done and the moment of truth is here! If you want, you can review your pipeline YAML file, and click “Save and Run“. Hold on tight for a few minutes, success is very close and it looks like this:
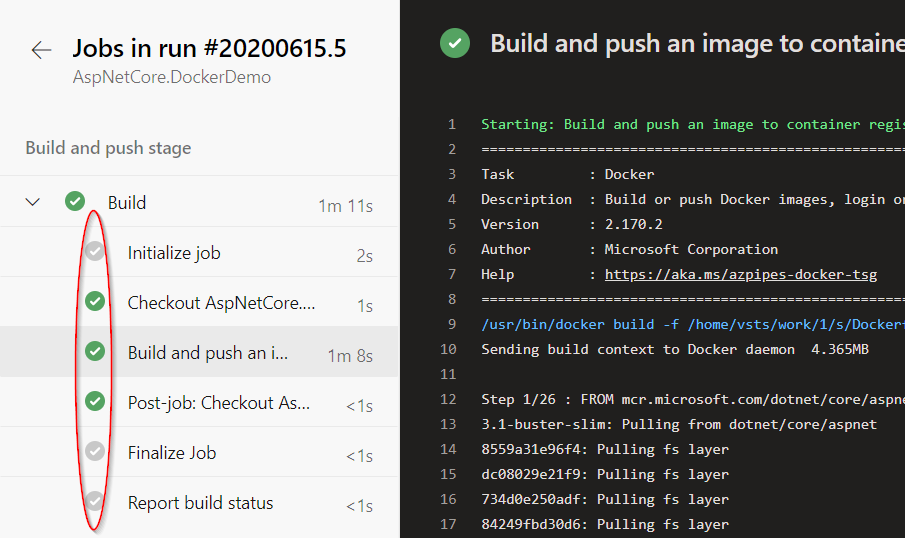
Steps to setup Azure App Service
Now that we are done setting up an Azure Pipeline, go back to portal.azure.com and follow the next steps to setup the last part, an Azure App Service.
Step 1
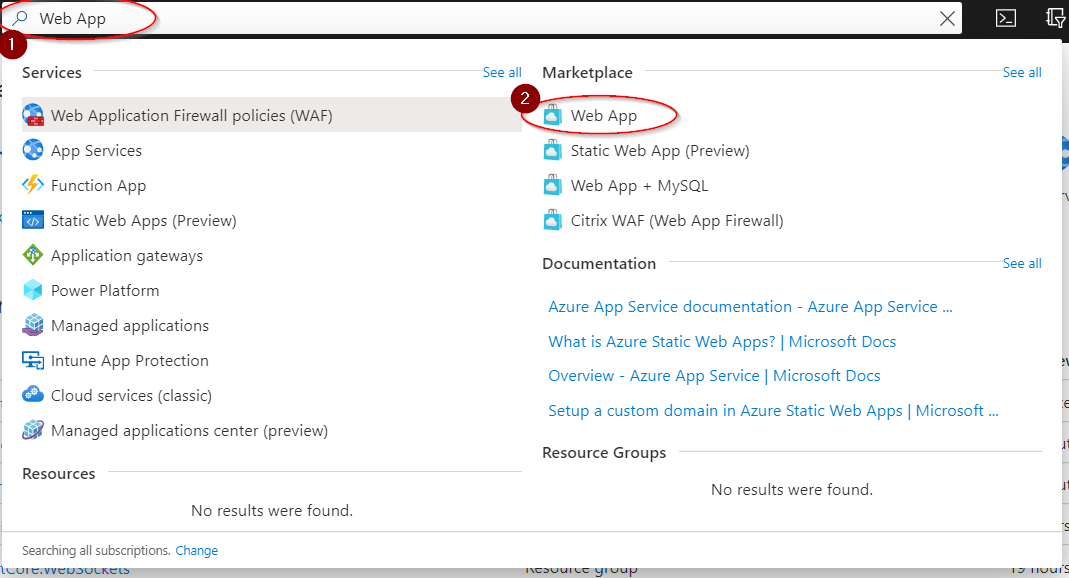
As before, use the convenient search bar on top to find what you want; this time search for “Web App” and click on the result you want see on the Marketplace group. The image below shows exactly the steps:
Step 2
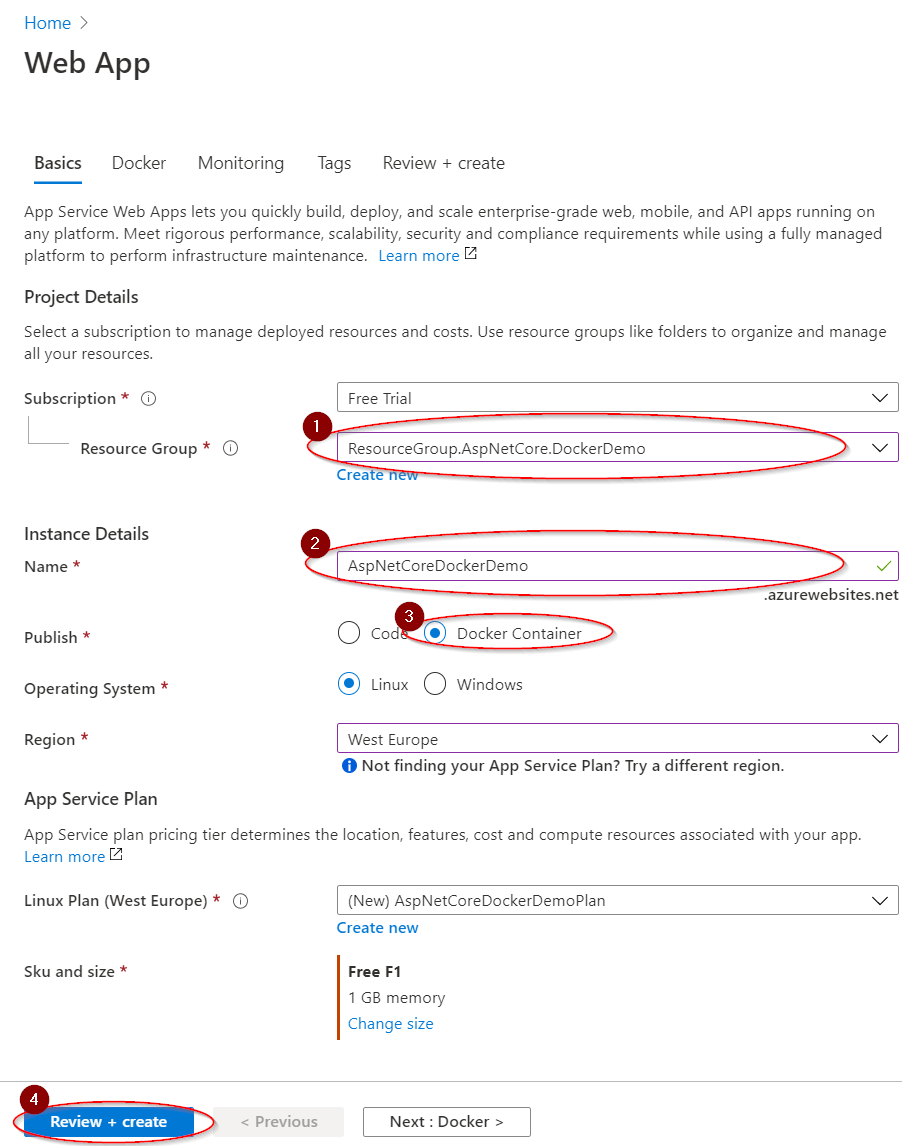
The “Create Web App” form will open with a few selections to be made. The minimum changes required are to select your Subscription and Resource group, and of course choose Docker Container as Publish. The “Name” will be part of your azurewebsites.net url, you will need it after the next step! For example, in this guide the url that the app will go live will be AspNetCoreDockerDemo.azurewebsites.net (pascal case is just for easy reading of course). If needed, select the appropriate Service Plan and click “Review + Create“. The image that follows has an oval shape over the most important choices:
Step 3
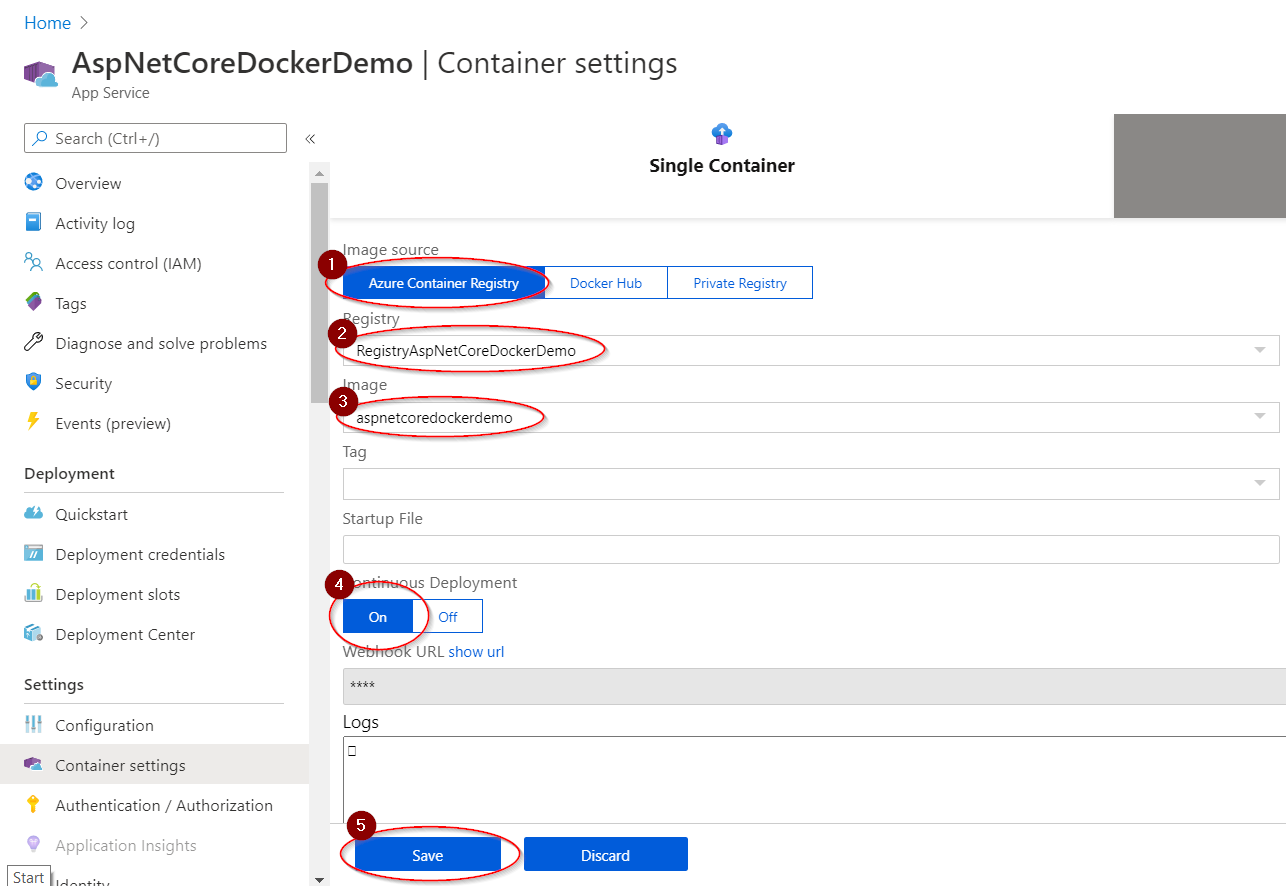
And we are finally done! There is only one last step, this one, to configure Continuous Deployment. Go to the resource you just created, and navigate to “Container Settings” on the left. Choose “Azure Container Registry” as the image source, choose the registry we created before and then the image. Don’t forget of course to set “Continuous Deployment” to “On” and hit “Save“. The image that follows highlights those selections:
Conclusion
Although it’s a process with many steps and potential pitfalls, if you do it once, you will realize that is more about configuring and less than anything creative! You just click and type a few things and you are done!


